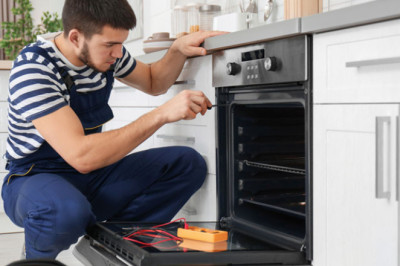
Epson Printers Not Printing Issues and Solutions
It can be very frustrating when you need to complete a crucial printing project and your Epson printer isn't printing as requested. Sometimes Epson printers stop printing suddenly. This problem is not a matter of just Epson printers, however it may be the case with any printer because of various technical reasons. Printer users might suddenly experience issues printing. There are many causes for this issue in the printer. Many of the issues can be fixed easily by you. Learn more about this article.
How to Repair Epson Printer That's Not Printing
It is sometimes possible that the Epson printer is not printing properly can be caused by a simple and straightforward cause. Therefore, it is recommended to conduct a quick check before trying to troubleshoot the printer using difficult technical steps.
● Make sure that the printer is Active
● The Printer Is Connected To The Computer Through USB
● Verify that the Ink Cartridge is Set Properly
● Verify if You Have Paper Correctly inserted into the Tray
● Check to ensure that the Printer Isn't Sending An Error Signal
● Clean the Printhead of Your Epson Printer
Epson printer is not printing properly could occur when the printhead is not properly cleaned. In some cases, due to the lower use of the printhead, Printhead get clogged. It is necessary to clean the printhead before you can perform the printing. Every printer comes with an inbuilt equipment for cleaning the printer head, so there is no need to be concerned about this. To clean your printhead, follow the steps listed below.
Step-1
Clean Printhead for Windows OS
-
Place a plain piece of paper in The Tray.
-
Find "Control Panel" in the"Search" Box on the Taskbar Then open it.
-
Click on Printers and Devices.
-
Right-click on your Epson Printer and select Printing Preference from the Options Menu.
-
Click on The Manage Tab.
-
Then click on Head Cleaning.
-
Click Now to Start.
-
Follow the on-screen instructions.
Also Read :- How To Fix Epson Printer Driver is Unavailable
Step-2
Clean The Printhead Mac OS
-
Put a plain paper in The Tray.
-
Click Here To Access Mac OS Desktop. Mac OS Desktop.
-
Click on Apple Menu and then go to System Preferences.
-
Click on Printer And Scanner.
-
Now click on the printer and click on Options and Materials.
-
Click on Utility Tab and Click"Open Printer Utility.
-
Then click on Head Cleaning.
Remove your Epson printer's printhead from Windows Computer
-
Cleanse all the Printhead from Your Epson printer.
-
Place the printed paper in the tray of your Epson tray for your printer.
-
The control panel is the main menu on Your Windows computer's search option, which is located on the taskbar.
-
Then, you will have to select"Printers and Tablets" from the "Printers and Tablets" option by clicking it.
-
Pick Computer & printer from the "Objects control panel" in Windows 10.
-
You must Right-click to open the Epson printer and choose"Print" from the menu Options.
-
After that, Right-click the non-printing Epson printer, and then select the print preferences option.
-
Then you'll be able to hit the button "Manage icon".
-
Then, you'll be able to see you will see the "Epson Printer Preferences Maintenance" page. Click on it.
-
For Epson Printer Repair, press on the "Head Cleaning" option.
-
Simply press on the "Start" key.
-
To fix the "Epson printer not printing" problem click"Start" or the "Start" option to initiate the head cleaning.
-
Finally, follow the on-screen instructions to finish it.
Also Read :- Fix Your Driver is Unavailable Printer Epson
Cleanse for Epson Printer Printhead from Mac
-
Print a basic piece of paper into the tray in your printer.
-
Now, start Your Mac computer.
-
Following that, Tap on the Apple Menu and then go to "Machine Setting".
-
On your Mac Click on its "Apple Menu" and then choose"Apple Menu", then click on the "Device Preferences" option.
-
Then, click to"Scanner and Printer "Scanner and Printer" option it will show you.
-
Within the Device Preferences option, click to select"Printers and Scanners" under the "Printers as well as Scanners" option.
-
Then, select then the Epson printer that won't print and then select the mac "option and supplies" option.
-
Now, click on the Utility tab first , and then click"Open" and then press the "Open Printer Utility" button.
-
Then then select"Utility" and then click on the "Utility" tab, and then open"Mac Printer Utility. "Mac Printer Utility".
-
Then, select"Head Cleaning" or the "Head Cleansing" option that you will see.
-
Under Printer Utility Click on"Printer Utility," then click the "Head Clean" option to fix error Epson printer that isn't producing error.
If you've installed multiple printers on your computer, it may also block you from printing with your Epson printer from producing. To fix this issue, you'll need do the following "Set Your Epson printer to default settings" on your computer. do this in these ways.
Select your Epson Printer to be the default printer of your computer
-
On Your Windows 10 computer, click on the "Start" button and then select the Settings.
-
Click to"Printer and Scanners." Tap on the "Printer & Scanners" choice that you will see.
-
Then, navigate to your "Devices" option, and then choose "printers or scanners".
-
Then, click next to "Select Your Epson Printer" from the printer's menu after which click"Manage" "Manage" link.
-
Finally, you'll need to click the "Set as default" button to complete the procedure.
Note to uncheck the checkbox If you've not seen the "Set as default option".
You've now set up the Epson printer to become the default printer on your computer. Print a document now. You can fix the Epson printer that isn't printing on your computer..
Verify the level of the ink cartridge
You must check the levels of ink on your Epson printer cartridge in case you find that your Epson printer isn't producing any documents. You can determine the levels of ink on you Epson through the steps below.
-
Check out the Control Panel of your computer's start menu.
-
Once you have done that, you'll have to click on and choose the "Computer and Printer" option.
-
If you are using the Control Panel option on your Windows 10 computer, press the "Computer and Printer" selection.
-
Then, click right-click on the Epson Printer option within the "Print Preferences" window and select"Print Preferences" "Print Preferences" option.
-
Right-click Your Epson printer and select the print preferences option from the "devices and printers" option.
-
Simply click onto"repair" and click on the "repair" option.
-
Choose open Status Monitor for Epson option.
-
In the menu for maintenance Click on Maintenance. Open your Epson Status Monitor by pressing it.
-
The quantity of ink contained in the cartridges is visible through the pane that has been updated.
-
If any of them show low amounts of ink If you notice any of them, you can fill your cartridges by purchasing a new cartridge.
Must Read :- Issues Regarding Epson Driver is Unavailable ?