

So you’ve been waiting patiently for your new Self Balancing Scooter, and now it’s here! You put one foot on and the hoverboard starts to move. You step off, and try again. Now you wobble back and forth. No go.
We’ve been there, so we thought we’d compile a short guide on how to use a hoverboard, to get you going in 5 minutes!
Getting On the Hoverboard
So, first things first, make sure your board is fully charged up.
Turn it on and place it in front of you, right in front of your toes.
If your board features a beginner mode, enable it now. Click here for instructions on how to do this with your remote.
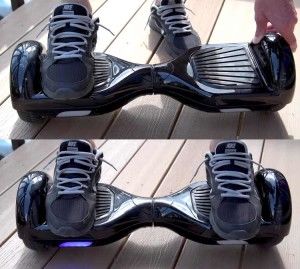
Do you ride a Hoverboard with the Lights in the front or back?
We get asked this a lot. Some people say that the LED lights are supposed to be a sort of “turn signals” for the people behind you, so they should go in the back.
Truth is, there is no forwards and backwards, you can ride however you please.
UPDATE: Most people ride their hoverboards with the LEDs on the front, and newer models specifically say that the lights should be on the front. So, we guess that settles it.
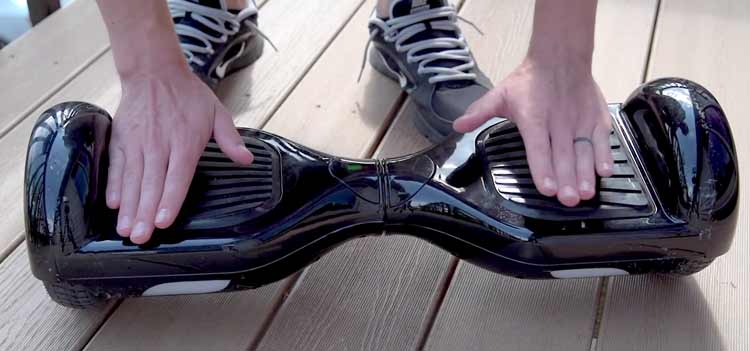
What you want to do is you want to put your right foot (or left, whichever is more comfortable) on the scooter. You’ve got to make sure of two things:
- Your foot is as close as possible to the wheel. A mistake we made when we first started was that our feet were not as wide as possible, and that makes riding the hoverboard A LOT harder.
- You keep the board “flat” (as in, level with the ground).
Now, once your right foot is on, just “step on” the scooter. If you overthink it, you will fall. Just step on it like you would on stairs.
Your first reaction will be to tense up, and this will cause you to wobble back and forth.
The best thing you can do is to look in front of you—not down—and relax. Just stand. Don’t think about moving yet, just loosen up and stand on the hoverboard.
Got it so far? Good.
Moving Around on the Hoverboard
Going in a straight line
Now, to move, the best way I can describe it is, just “think” of where you want to go.
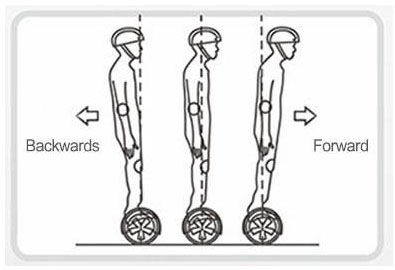
As you probably already know, on a hoverboard segway, you lean in the direction you want to go. This may make you think you have to do more than you actually do to move.
It’s not as much leaning as it is slightly shifting your weight. If you lean too much, you WILL fall.
So, just try going forwards first.
Turning
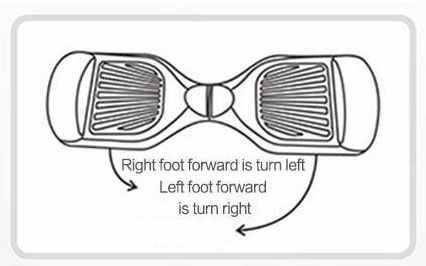
Then, attempt a slight turn. This should come naturally, it’s almost like the scooter “knows” what you want to do. But, basically, you turn by “twisting forward” the foot that’s opposite your turning direction: say you wanna turn left, just push your right toe forward.
To attempt sharper turns, you may want to start “twisting back” the other foot too, that is pushing down the heel. When you’re an expert, you can literally spin in place like this.
Now try to go backwards, too.
The Best Way to Practice with Your Hoverboard
Once you got these basic movements down, you should try to do laps, turning in one direction only (think Nascar circuit), until you get more and more comfortable.
When you feel comfortable enough, try to do one lap in one direction, and then another in the opposite direction.
Stepping Off the Hoverboard
To step off the hoverboard, you simply want to “reverse” what you did to get on. Try to shift your balance to your dominant foot, and then step off with your non-dominant foot. Sometimes you’ll have the instinct to sort of “jump off,” but try to resist it, and do a controlled dismount. You’ll avoid scratching your hoverboard, and possibly injuring yourself.
Bear in mind that stepping on and off your board is probably the hardest thing of the whole process and it’s what’s going to take you the longest to master. Practice just stepping on and off for a little while to get used to it.
How to Use the Hoverboard’s Remote
Because of the nature of hoverboards, some manufacturers include more or less functionality in the remote that comes with your hoverboard. The following instructions apply specifically to the IO Hawk, but they should be applicable to most other manufacturers’ remotes too.
(Click here for a list of the Best Hoverboard Brands on the market.)
Turn On the Hoverboard
You can only turn on the hoverboard by pressing the button on the hoverboard itself.
Turn Off the Hoverboard
You can turn off the hoverboard by holding the “lock” button on the remote.
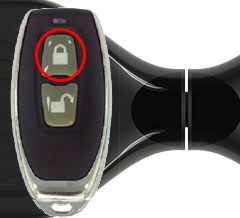
Lock the Hoverboard
You can lock the hoverboard by pressing the “unlock” button on the remote. You unlock by pressing the same button again. (Notice the battery light is red when locked, and green when unlocked)
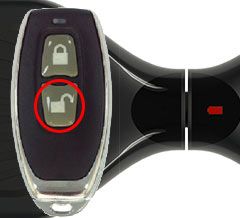
Set the Hoverboard to Beginner Mode
Beginner Mode will set the hoverboard to a top speed of 3mph as opposed to the regular 6.2mph. It’s a good way to gain confidence in the board.
(Note that not all hoverboards have a beginner mode like the IO Hawk.)
To enable Beginner Mode, simply press and hold the “unlock” button for 3 seconds. The “IO” symbol will flash green. Press and hold for 3 seconds again to disable Beginner Mode.

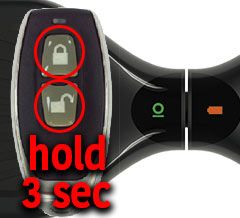
Calibrate the Hoverboard
Sometimes the gyroscopes on your hoverboard will get confused as to what is level. It happens sometimes after crashing. So how do you fix it? You re-calibrate your board.
Simply put your hoverboard on a level surface (this is crucial), turn your hoverboard on. Lock it by pressing the unlock button once. When the battery symbol is red, press and hold both the “lock” and “unlock” buttons on your remote.
The hoverboard will beep, the battery symbol will be orange and flash together with the “IO” symbol.
If you’ve followed this guide, we’re confident that you’ll be zipping around on your hoverboard in less than 5 minutes.
If you haven’t yet bought your hoverboard, make sure to check out our Self Balancing Scooter Buying Guide.
Have fun!


