views
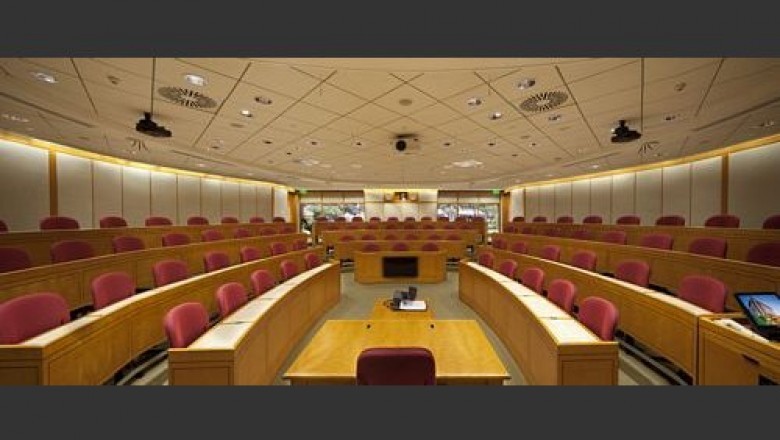
The Harvard Business School Campus at Taj Lands End was inaugurated by Mr. Ratan Tata himself in early March 2012.
The new HBS campus, with a seating capacity of up to 82 students, will offer state-of-the-art multi-media facilities that augment the educational experience of the students. The room, a first of its kind in India, is virtually indistinguishable from the MBA classrooms in Boston in terms of aesthetics as well as technology, IT infrastructure, telecommunication equipment and connectivity to Harvard Business School’s campuses all over the world. All together, the IT infrastructure and communications equipment is worth a cool 50 million US dollars. An obvious requirement was a state of the art fool proof waterproofing system that would guarantee continuous connectivity to HBS’s campuses world wide and ensure zero downtime.
The site chosen was underneath an exposed terrace about 14 years old. The project was undertaken in the monsoon of 2011 and the entire slab was leaking in multiple places with water gushing in through a variety of cracks, cutouts for pipes and a host of other imperfections in the old slab.
Upon removing the top IPS layer, an exceptionally large expansion joint about 5 cm wide was uncovered. The architect, as well as the clients were caught completely unawares and the leakages as well as the unanticipated expansion joints was threatening the feasibility of the site as well as the project completion deadline.
Fig 5: Harvard Business School, Taj Lands’ End Campus

Fig 6: Unanticipated Expansion Joint 5 cm wide on the Terrace above HBS

General Methodology used:
SURFACE PREPARATION
1.Remove all the existing layers of filing on the RCC slab and expose the RCC slab.
2.Clean the RCC surface of all loose particles, dust, cement laitance, etc. Surface preparation is of prime importance as the degree of performance of the coating is directly proportional to the extent of cleaning.
3.After proper cleaning, Identify the construction joints, cracks, honeycombed areas, etc. on the RCC surface and fill the cracks on the RCC surface using Polymer Modified rich mortar prepared by using POLYALK EP.
4.Apply a low viscosity crystalline surface penetrator sealant- SUNFLOWER METALLIC over the cast in situ slabs in three coats
5.Allow the material to penetrate into the slab for sealing the RCC pores.
Fig 7: Surface Preparation and cleaning using air suction device
WATERPROOFING SYSTEM:
1.Provide and apply a primer coat of FLEXIROOF –PU PRIMER on the cleaned RCC slab surface using a soft paint brush. Shake the container well and directly apply the primer by brush. Allow to set for 30-45 minutes depending on the ambient temperature.
2.After the primer has totally cured and dried, apply FLEXIROOF-PU by brush, roller or airless spray equipment. Apply at a rate of 1kg/sq.m. for the first coat evenly over the primer surface and allow to cure for 12-24 hours.
3.Extend the coating on the sides of the walls and aluminum glazing frames up to 300mm.
4.After ensuring that the first coat is set and cured, apply the second coat in similar manner at a rate of 0.5 kg/sqm and allow to cure.
5.While the second coat is has reasonably hardened but still wet and tacky on surface (say after 12 hours), sprinkle sand over the surface to make it rough so as to provide mechanical key for the protective screed.
6.Allow the two coats of FLEXIROOF-PU to dry for 2-3 days before proceeding with the protective screed.
7.Lay the protective screed over the same in CM 1:4 in average thickness of 10-12mm and cure the same.
8.Admix one pouch of anti-shrinkage admixture- SUNPLEX (330gms pouch) per 50 Kg bag of cement in the protective screed mortar.
9.Provide IPS over the protective screed in required thickness and slope.

Fig 8: Application of Flexiroof PU – liquid applied, moisture cured, elastomeric, modified polyurethane membrane
VAPOUR BARRIER COATING:
1.Clean the surface using air blowers BUT ensure that surface is DRY.
2.Mix SUNEPISEAL primer in a plastic container in the ratio 4 part of Part-A and 1 parts of Part-B using a low speed air driven stirrer. Mix uniformly to form a brushable consistency.
3.Apply this as a priming coat of SUNEPISEAL 478 coating over the cleaned dry surface using paint brush and allow to dry.
4.After the primer has dried apply two coats of SUNEPITOP by mixing in a plastic container in the ratio 4 part of Part-A and 1 part of Part-B using a low speed air driven stirrer. Mix uniformly to form a brushable consistency.
5.Apply this coating at 24 hours interval between each coat.
6.Extend the entire application up to 1.0 meter over the side walls and aluminum frame.
7.Do not allow foot traffic for next 48-72 hours till full cured.


