

"How To 3d Print Clothes?" is a subject that many 3D printer enthusiasts wonder about. You may try printing on a frock or a shirt. You may download a variety of designs and models to let you develop your imagination.
How can we make clothes using 3D printing technology?
"In a 3D printer like any other product," is the ideal response to this query. But it's not a big concern if you don't have access to such equipment. Understanding how it works and what has to be done in order to achieve a three-dimensional structure is the most important factor that will help you tackle these challenges.
What exactly do you require?
The first thing that will assist in printing garments is that it is not necessary to use a 3D printer.
This may be done manually. So, what are we going to need for this? Needless to say, a needle and thread! Additionally, having a pair of specific scissors for cutting cloth is important when working with threads.
You'll also need an office assistant who understands the geometry of this subject to avoid getting lost in space-time coordinates when developing models.
Ok. All of the essential supplies and tools were evaluated. Let's have a look at what we can do with this technology now.
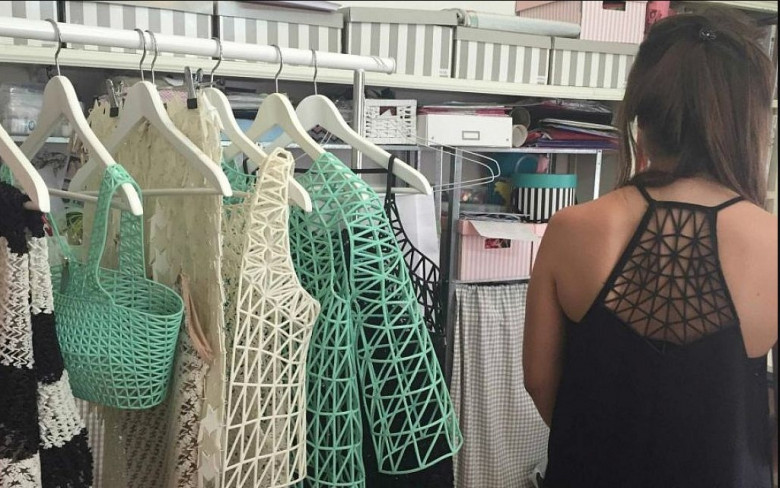
Clothing may be made just like any other commodity, such as shoes or pants (see figure above).
However, due to their limitations, printing clothing with traditional 3D printers makes no sense: they are designed for printing three-dimensional objects with smooth surfaces (figurines like trolls or dragons), but if you try to print something more serious (for example, the handle of your favourite mug), the smallest details will be the size of a fly.
However, on the market today, more and more economical printers for home use, based on the SLA/DLP technology, are appearing, allowing you to print components with extremely fine details.
Furthermore, unlike traditional 3D printing technologies that employ three "point coordinates," new printers allow users to generate volumes by simultaneously manipulating light beams from several projectors.
Furthermore, some businesses have already established an algorithm for converting.STL data to G-code, which prepares a three-dimensional model for printing with two-dimensional equipment (for example laser engraving machines or cutting tables).
Another option for making clothing is to use a 3D printer to create fibres from which to weave garments. Almost any sort of cloth, such as cotton or woollen, may be made at home using this technique.
It should be mentioned that not all printers are capable of producing high-quality printed papers. In general, it is pointless to waste time printing garments if your printer is incapable of producing the required material.
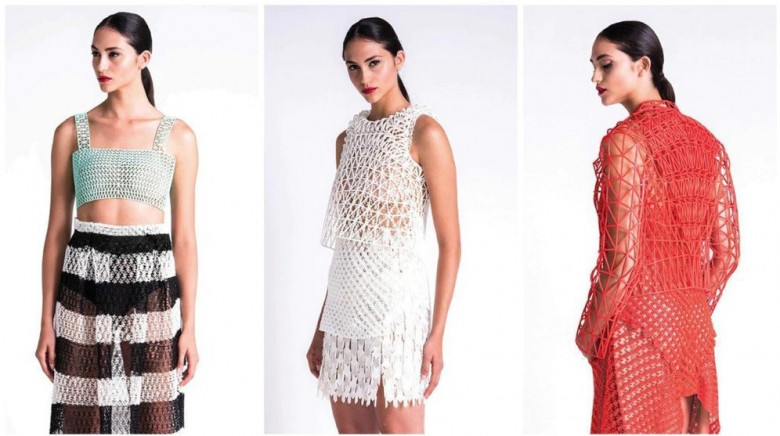
Finally, there is a third approach to produce garments with a 3D printer — utilising special software and a modelling table based on the SLA/DLP technology. Users can use this software to create a three-dimensional pattern or model of clothes (see figure above). Because they are made using specific computer programmes, these models are commonly referred to as CAD models (Computer-Aided Design, CAD).
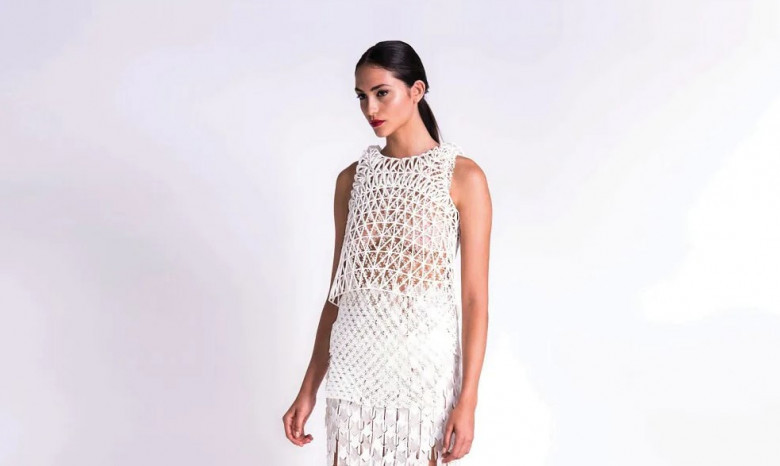
Some 3D printers let you take a model from the software and print it out on your own. Users may do this directly with a laser engraving machine, as seen in the photo above.
Related Post: wholesale fashion clothing china - guide stock wholesale clothes from top china suppliers!
3d models of clothes for Solidworks
You may also generate a template for laser engraving equipment after processing the data in the CAD system.
Perhaps people who utilise 3D printers to make garments would like this way. However, keep in mind that all models must be scaled to fit the size of your printer, which implies that you must scale them before processing. This is seen in the diagram above.
Finally, if you've read everything up to this point, you might be curious in what software an engineer uses while working with 3D printers. For example, I normally write my own software using the Qt framework (see figure above). It enables me to develop three-dimensional models and includes new capabilities for printing clothing from a three-dimensional printer.
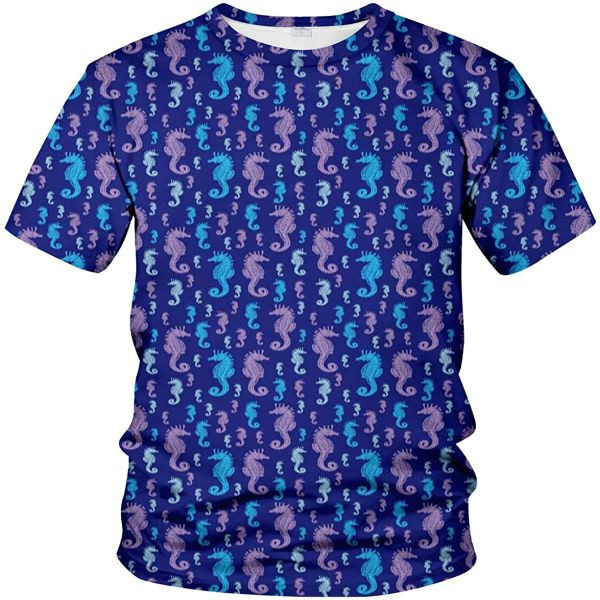
Of course, not every engineer creates their own software for controlling a 3D printer, but it might be handy in some cases if you want to enhance or add new features. In the shot above, I used my programme to draw a design on a T-shirt.
3D printed clothes material
People will be able to create shirts or other pieces of apparel directly from digital templates in a future of 3D printers and mass customisation.
This is how Jabil sees the future of digital fabric, and it is a viewpoint held by many others. 3D printing has been infiltrating our lives for some years, and the first items produced were simple toys, but it has grown into a more serious technology with an increasing variety of uses beyond standard additive layer manufacturing (ALD).
At the moment, 3D printing materials are limited to thermoplastic powders, waxes, and resins, as well as composites such as wood/polymer combinations and metals such as stainless steel and titanium. The most prominent of these is the plastics family of materials, which is employed in the technology of 3D printers itself.
Plastics are macromolecules (polymers) created by chemical methods that produce lengthy chains or molecules with repeating atom groups (monomers). These groups contain carbon and hydrogen, as well as oxygen, nitrogen, and occasionally additional elements.
The majority of 3D printed materials are recyclable. They are biodegradable as well. Organic cotton, repurposed fabric, and silk organza are used to make the garments.
3D printed dress designer
A young woman from South Africa in her early twenties. First prize at the Maker Faire in New York City and a nomination for “Best in Show”.
By all accounts and measures, MakerGirl is on the rise — the next big thing in the world of 3D printing.
And yet, when we contacted MakerGirl via email to find out more about her, she went by only one name: John. Male pronouns were used as well, such as “he” and “him.” It was only upon researching this article that we found out that he is now “she” — namely, Rebecca Hansen, now famous as MakerGirl.
This followed days during which we had chatted with him over Skype under his (now her) handle @MakersWish.
It’s a common enough practice these days for 3D printing company reps to adopt a single name, particularly when exhibiting at a trade show or giving a talk somewhere. It is far less common for an individual engaged in some form of 3D design work to do so — which made us wonder just what was going on with MakerGirl and why this person felt the need to use such an identity online.
Thus we were quite surprised when Hansen contacted us via email to let us know that she had been “outed” as male by 3DPrint.com (“3D Printing Company Apologizes After ‘MakerGirl’ Revealed As Male”) last week (although it now appears that he may have been mistaken for female at that time).
Today, Hansen informed us that she would be “going forward” with her true identity.
Hansen showed remarkable maturity in this exchange, taking responsibility for what she said was an error on her part when choosing the wrong name to use online. This is not something we often see from someone so young, and it’s commendable. We can only hope that there are no other mistakes like this in the future; if MakerGirl must stand or fall on her own merits, then let her do so. She has our support either way.
3d printed fashion accessories
3D printed fashion items are gaining popularity.
Lee-Ann van der Merwe's 3D printed Wonderwoman Bracelet is one of the most recent 3D printed fashion accessories.
Lee-Ann van der Merwe, a fashion designer and business owner, posts her work on Facebook every day to encourage other makers and artists. She has a large number of admirers that follow her and like or comment on her postings.
Even large corporations, such as Disney South Africa, expressed interest in purchasing one of the bracelets she produced for herself. Her message went viral after a fan called Siviwe Khumalo shared it on the Hipster Army Facebook page, which has over one million followers!
Following this, Ann had several requests from other fans to make one for them as well.
The bracelet is constructed in two sections that are bonded together. The bracelet will not come off easy; in fact, it is pretty difficult. It's made of flexible filament, yet it can endure pressure and won't break! It's also really comfortable to wear, making it ideal for everyday usage.
You don't have to go out of your way to get the perfect present; you already have it in your hands! Download the files below and be inspired by this artist's creation of a famous super-heroine, and share her work with all your friends that enjoy comics or superheroes, since we could all use a little Wonder-woman in our lives!
How to make 3d printed t-shirts?
I had no idea how advanced 3D printing has grown until lately.
Of course, I was aware of it, but aside from those developed for medical purposes or to make scale models, I assumed that this technology would not be employed by consumers anytime soon due to its expensive cost.
I was blown away, although there were a few things that didn't seem really intriguing to me.
That includes clothes and accessories, simply because I'm not a "style" person and have never bothered about what type of style is now popular or anything.
This may be my most serious shortcoming as a human being since I can't comprehend why somebody would murder a perfectly excellent bull for a pair of leather shoes. It's not like you require them to survive. But forget about fashion for a while... If you're interested, there's lots of information available online! So, let's return to the issue of 3D printed T-shirts.
This, I believe, will be a fresh beginning for 3D printing! People will buy your items if you can customise them. Consider how wonderful it would be to have your initials or something else custom printed on your T-shirt. Isn't this a one-of-a-kind gift? Or perhaps not that unique, but still cool (at least in my opinion)
Find out more way to created custom 3d tshirt at: https://printerval.com/3d-t-shirts
Best 3d t-shirt printing machine
3D printers could help in the production of prototypes, or even real parts of a system, especially if you're doing many iterative tests or assembly. However, 3D printers may be prohibitively expensive for those who deal with machine components; the RepRap project was founded to address that by generating open-source 3D printer designs that anybody could construct themselves or even sell as long as the blueprints were also made accessible.
Today I'll show you how to utilise Mendel90, a popular version of the original RepRap design named after one of its creators, Hosein John Mostafavi from Australia. Before we begin construction, have a peek at the completed product in the video below.
The Mendel90 is a fantastic design since it can be readily scaled up or down and is quite durable. Mostafa created it in 2009 with this notion in mind: "If I needed to build anything enormous, I wanted to name it 'Made on a RepRap' rather than 'Made in China.'" We're all hackers at heart, and we take joy in hacking things together." This 3D printer is capable of both extrusion-based printing (like with any other FDM machine) and much more. If you haven't guessed from the name of this website, there's also a long list of upgrades available for Mendel90 owners, so have a look.
Preparation: The first step is to gather all of the necessary supplies and tools for this project, as seen in the image above.
Mendel90 printing parts as well as equipment (from 3D PrinterCzar) with a cooling fan and an Arduino Microcontroller two battery packs 18650 an adjustable Pro Micro holder, a glass build-platform surface (or just apply the blue painter's tape) as well as three stepper motor drivers from Tinkerforge (Bipolar, Unipolar), and their power modules come with.
Do not forget to include filament. For this project I made use of the white PLA filament made by Makerbot.
Assembly: Now that we have all of the essential components, we can begin putting them together. For the time being, I recommend constructing this printer inside a box to keep everything secure from dust and children. Begin by printing all of the Mendel90's printed pieces, then assemble them one by one like you would a RepRap machine. Important information:
Do not tighten any screws in the lower section that holds the extruder stepper motor; otherwise, it may break. Also, be sure to install your power supply (18v, 12v, or 24v) to the rear panel during this stage.
Make sure that the upper Y carriage slides smoothly on top of the LM8UU bearings. If not, simply sand them with fine sandpaper.
The upper Y motor mount can be fitted with either a NEMA17 or 23 stepper motor.
The same part number in both cases; the only difference is the length of the shaft ( 17mm for NEMA23).
Once all printed parts are built, start by adding heat-set inserts to the LM8UU bearings as you would for any RepRap machine (if you haven’t already) before fitting them onto each axis. Also, add some grease into each bearing before screwing it into place.
Once that’s done begin assembling the X-axis assembly following Mostafa’s assembly manual. After this stage is complete, take note of how much space is left between the bottom edge of Z smooth rods and their holders. Keep this in mind for later when we fit in the Z-axis assembly.
With all of your Mendel90 printed parts ready, it’s time to start assembling them using the hardware provided with the kit. Begin by securing each smooth rod into place using M5 bolts with washers on top and bottom, making sure that their lengths are equal on both sides.
Then add Y end stop micro switches followed by mounting brackets. I personally use a Tinkerforge MicroSD breakout board instead which you can see below (shown without microswitch). The reason for this is because I like to control my machine via software (i.e G-code) instead of physical buttons; however, you’ll need to do some soldering first if want to go down that route.
With that done, add a stepper motor onto each of the Y-axis mounts and secure them with M3 bolts, along with a belt clamp. Also, note where the belts sit on the carriage, you’ll need to know this for later on when we wire up the machine. Don’t tighten any screws yet!
3D printing technology is the future of fashion. One company, Minkpink has perfected their process to create dresses using a patented method that creates garments in just six days. They have even partnered with French designers who are creating digital designs for this innovative new way to get clothes printed on demand! This means you can now buy designer clothing without ever having to leave your house or wait months for it to come in the mail. It’s time we all embraced our inner geek and got excited about what 3D printing will mean for us not only as consumers but also professionals working in creative industries like fashion design. Are you ready?


